Thursday, April 4, 2013

The Scone Ranger


When I was first approached by a local Bistro to supply scones for their cafe menu I didn't know how to make them. My husband had to teach me the night before I was to bring in tasting samples. Also, I had never made gluten free anything at that point and the owner, being a celiac, requested I include non-glutenous scones in the sampler. I was up for the challenge.

I found a recipe from a reliable source and modified it slightly for both gluten and gluten-free scones. It took a little adjusting and testing of gluten free flours before I got the right texture. But eventually I landed on the right combo.

Since then I have made thousands of regular and gluten free scones based on this recipe (for the Bistro, farmer's market and private orders). And not just your typical plain vanilla scones. I've tried to incorporate flavor trends from champagne and strawberries to rosewater and pistachio to pumpkin to jasmine poached peaches and thyme. And let's not forget savory wonders like brown butter bacon date and brown butter bacon pear and Gruyere...well let's just say brown butter bacon anything is a feast for the senses. I'm still working on the champagne and strawberries scone recipe, but I am very close.

My mission was to broaden the palates in our community. With a popular mass manufactured pastry franchise around the corner I wanted to bring something other than the usual to town. Sometimes I sold out, sometimes not. I am, however, hugely grateful for the Bistro for giving me creative license to explore new flavors and to the town for their willingness to try them.

Below is the basic scone recipe and then a few variations. I will post more variations at a later time.

REGULAR SCONES

To do:
Preheat your oven to about 360 degrees F. Place parchment paper on a cookie sheet.
whisk together:
1 1/2 cups unbleached all purpose flour
1/2 cup cake/pastry flour
2 1/2 tsp baking powder (fresh, opened within the last month)
3 tbsp sugar
1/2 tsp salt

In a measuring cup whisk together:
1/2 cup plain yogurt (I use whole milk yogurt)
1 egg room temp (for room temp: place egg in small bowl and cover with hot water, let stand for 2 minutes)
1 tsp vanilla

*optional: sanding sugar and egg wash (1 egg, whisked)

Take dry ingredients and cut in one stick (1/2 cup) of cold unsalted butter (either by food processor, or pastry cutter or by hand...it's best to touch it as little as possible so the butter remains cold).
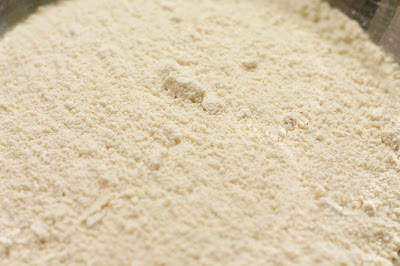
 The texture should be sandy and mealy. Pour into bowl.
Pour wet mix on top and stir in with fork.
from pumpkin scone recipe - the base recipe would not be orange!


Don't over work it, just until all the wet is mixed in...should have some crumbly bits left at the bottom of the bowl. If you find it's still too dry, add a little more yogurt or heavy cream to help.

Dump out mix onto a lightly floured surface. gently work in any crumbly bits. Form dough into an 7-8" disc and cut into 8 pie-like portions.


Place on parchment on cookie sheet.
*brush egg wash (one egg whisked) on top and add sanding sugar*
Bake for 20-ish minutes. Should be golden around edges and a little golden on top.

Garnish how you wish. Some scone recipes, instead of sanding with sugar, I will add melted Belgian white chocolate after they are baked and cooled, like the pumpkin scones shown here:

 And White chocolate Pistachio Rose scones here:


GLUTEN FREE

Substitute all purpose flour and cake flour with 2 cups El Peto all purpose gluten free flour. This is the only flour I have found that seems to directly substitute without having to find multiple flours and emulsifiers.

Use the rest of the ingredients as per regular scones and follow the same process. Though use the gluten free all purpose flour to "flour" your work surface and hands. The dough will be stickier* and should be a little more moist than the regular scone recipe, but this will help give it the texture you want when they are baked. Just dust a little more gluten free flour on top of the dough when you dump it out the on the floured surface. And flour your hands as needed.

*Also note that a stickier dough makes it difficult to stir in squishy fruits like raspberries and blueberries without crushing them.

VARIATIONS (work with both regular and gluten free scone base)

Brown Butter Bacon Date

To do:
  1. Place 8 slices of bacon on a foiled cookie sheet and bake in the oven on 400 F until crispy.Place on paper towel and while still hot crush into tiny bits.
  2. Take half of your stick of butter and place in a sauce pan and cook it on low-medium heat until the milk solids have browned (not blackened). Place in fridge until re-solidifies.
  3. Chop 1 cup of dried dates (or fresh is amazingly delicious if you can get your hands on fresh dates)
  4. Substitute brown sugar instead of regular sugar
  5. Follow directions above until it comes time to cut in the butter. Cut up the remaining half stick of butter and then add the browned half into the food processor (or cutting in by hand).
  6. before adding the wet to the dry, add the bacon and dates to the dry and pour the wet over top and mix, disc, cut, egg wash (with out sanding sugar) and bake as directed.

Lemon Strawberry

To do:
  1. Wash/scrub 1 lemon (organic preferred)
  2. Follow dry ingredients adding the zest of the whole lemon into the dry ingredients
  3. Continue with cutting in butter.
  4. add 1 cup chunk chopped strawberries to dry
  5. pour wet over top and mix, disc, cut, egg wash/sanding sugar and bake as directed.

 Caramel Apple

To do:
  1. In a saucepan add 
    1. 4 cups chopped apple,
    2. 4 tbs brown sugar
    3. 1 tbs cinnamon
  2. cook on low-medium heat until apples are soft and liquid is reduced to thick and caramel-like. Set aside
  3. Follow scone base wet and dry directions as above. Add 1 cup of caramel apple mixture to dry ingredients and pour wet over top.
  4. Mix, disc, cut, egg wash/sugar, bake as directed.

Chai Pear

 To do:
  1. Add to dry ingredients:
    1. 1/4 tsp ground cloves
    2. 1/4 tsp ground nutmeg
    3. 1 tsp cinnamon
    4. 1 tsp ground ginger
    5. 1/2 tsp ground cardamom
    6. 1/4 tsp ground all spice
    7. 1/4 tsp black pepper
    8. 1/4 tsp ground coriander
  2. Peel and rough chop pear so you have 1 cup chopped. Set aside
  3. Cut in butter to dry ingredients
  4. Add pear to dry.
  5. Pour wet on top, mix, disc, cut, egg wash/sugar, bake as directed.

Jasmine Poached Peach and Fresh Thyme

 To Do:
  1. Place in-season peach in saucepan and cover with water.
    1. add 3 jasmine green tea tea bags (or 3 tbs loose tea)
    2. bring to a soft boil
    3. Poach until peach is soft and skin easily peels off.
    4. Remove from water, let cool.
  2. Add  cup honey to jasmine peach water and reduce to 1/4 cup or until quite thick and syrupy. (will take some time) Set aside.
  3. Follow scone wet and dry ingredients directions minus the sugar as above.
  4. Add 2 tsp fresh thyme to dry ingredients
  5. Cut in butter
  6.  Add 1/4 cup reduced jasmine peach honey syrup to wet ingredients and whisk.
  7. Slice and chop poached peach and put on dry ingredients.
  8. Pour wet over dry and mix, disc, cut, egg wash/sugar, bake as directed above.

 Brown Butter Bacon Pear Gruyere

To do:
  1. Place 8 slices of bacon on a foiled cookie sheet and bake in the oven on 400 F until crispy. Place on paper towel and while still hot crush into tiny bits.
  2. Take half of your stick of butter and place in a sauce pan and cook it on low-medium heat until the milk solids have browned (not blackened). Place in fridge until re-solidifies.
  3. Peel and chop pear so you have 1 cup chopped, set aside. 
  4. Grate Gruyere so you have 1/2 cup.
  5. Follow directions above until it comes time to cut in the butter. Cut up the remaining half stick of butter and then add the browned half into the food processor (or cutting in by hand).
  6. before adding the wet to the dry, add the bacon and pear and Gruyere to the dry and pour the wet over top and mix, disc, cut, egg wash (with out sanding sugar) and bake as directed.
Sunday, March 10, 2013

Hiatus...

We're moving! Husband is going back to school in the fall so we are packing up house, selling everything and heading to...well we're not sure yet. We've narrowed it down to three schools and are waiting to hear which one(s) will take us...him. So while all my baking plans are wrapped in bubble wrap and tucked away for the next little while, I do intend to supplement the blog with classic recipes I've shared with my community over the past few years (and already have pictures of!).

Exciting times ahead! City-ish life, here we come!

Saturday, February 2, 2013

Mack the Cake...Jaffa style

 Orange cake with Belgian dark chocolate buttercream and orange whiskey marmalade filling.
Lee Mack has made me pee my pants twice. To be fair the first time was shortly after giving birth, but the second--I have no excuse.

For those of you who do not know this funny man I implore you to get to know him. Start with The Sketch Show, then alternate between his sitcom Not Going Out, his stand-up shows Lee Mack Live and Going Out, and the panel show Would I Lie To You. He's the kind of funny you can laugh freely at without wondering if you've set women's rights back 50 years by doing so. That's not to say he isn't confrontational, or cheeky...just not disturbingly on the edge like many of his peers in his industry.

I have much to thank Mr. Mack for. First, for making me laugh so hard I had complete sphincter failure. And second, inspiring me to get back into writing. He did a short interview, posted on the BBC Not Going Out website, wherein he states:"...people will argue that there are loads of great female (comedy) writers but the truth is all the great female writers are busy...there are more men in comedy than women..." for some reason that struck a chord. In a good way. A little bell went off, "You're a writer. Try your hand at writing comedy." So I dived into books for writing comedy and sitcoms. I wrote an episode for a sitcom as practice and in a moment of delusion sent it on to the production company. I've been building a repertoire of sitcom and feature film synopses ever since. I'm no stranger to film. I have a masters degree in Cinema/TV production. But it has been collecting dust for a dozen years. It's nice to be back.

I was eager to read his autobiography because I wanted to know what it takes to get into comedy and if I had the goods. 

His autobiography reads like a timeline but he cleverly ends each chapter with conversations in script form with a psychiatrist...for, you know, (*whispering*) the touchy/feely bits. He says you don't have to be special to write comedy. But after talking it out with the psychiatrist he also worries he might have ADHD and mentions schizophrenia...both of which sound pretty special to me. Also "Mack" is a stage name not his real name, so he puts on someone else when he's writing or performing comedy...as a "defense mechanism" (a term that comes up a lot).

So I gleaned from his psychiatrist that to make it in this business you have to be convinced your real life is normal, but put on the armor of a hyperactive alter ego with attention deficit so no matter what people throw at you, it isn't really you they're beating...and somehow that gives you the strength to persevere and keep getting back on stage until the beatings turn into sitcoms and theater tours.

Right.

As this information was sinking in, a line he says in an episode of Not Going Out kept playing over and over in my mind, "If I only had a Jaffa cake right now, life would be grand." Of course you like Jaffa cakes. They're the most schizophrenic treat on the planet. Are they a cookie or a cake? Probably a cookie at home but a cake for the fans.

Jaffa Cakes...sort of a sponge biscuit with orange jelly with a thin coating of chocolate.
Since we'll only really ever know the Mack side of his personna, cake it is. So, inspired by Lee Mack and his psychiatrist I created a version of a Jaffa Cake layer cake, but one that is more sophisticated than it leads on and without additives or a punishing chemical aftertaste...much like the man himself, I suspect.

In line with my series of posts on autobiography inspired treats, if Lee Mack was a cake he'd be an orange cake with Belgian dark chocolate buttercream and orange whiskey marmalade filling.

Cheers, Mr. Mack. And thanks for the laughs!

Orange whiskey marmalade
use buttercream to make a dam to prevent marmalade from oozing out the sides
 

Orange Cake with Dark Belgian Chocolate Buttercream and Whiskey Marmalade filling

Cake Adapted from Martha Stewart
Orange Whiskey Marmalade recipe
Dark Belgian Chocolate buttercream recipe (read *UPDATE for correct version)

Cake Ingredients:
1 1/2 cups unsalted butter at room temperature
3 3/4 cups all purpose flour
2 1/2 tsp baking powder
3/4 tsp salt
2 cups granulated sugar
7 large eggs
1 1/2 tsp vanilla
1 cup whole milk plain yogurt
zest of 2 oranges
  1. preheat oven to 350 degrees F
  2. prepare 3 8" round cake pans (butter and dust with flour and add a parchment round to the bottom of pans)
  3. Whisk flour, baking powder and salt.
  4. in a mixer fixed with paddle attachment cream butter and sugar until fluffy
  5. add eggs one at a time scraping down the bowl after each addition and blend until smooth
  6. add vanilla
  7. add orange zest to flour
  8. add flour and yogurt alternately beginning and ending with the flour
  9. divide batter among pans
  10. bake 25-30 minutes until tops give a little bounce.
Let cool completely before filling and icing.
Prepare dark Belgian chocolate buttercream.

When layers are ready cut the tops to make and flat even surface. Use the buttercream to make a "dam" and prevent marmalade filling from oozing out. You don't have to cover the cake with buttercream if you prefer less icing. It's just as flavorful with some on top and the "dams" in between the layers.

Friday, February 1, 2013

Marmalade gets tipsy...


Orange Whiskey Marmalade
"I looove marmalade!" (she shouts and jumps up and down on Oprah's chair) It is the Katie Holmes to my Tom Cruise...well, when the love affair first happened. And I'm not planning to brainwash my marmalade or use it to get a seat on the big space ship after I die (or however that religion works). So I don't see us breaking up any time soon. I do, however, plan to get it a little drunk.

I've been wanting to make it for some time to use as a filling for a cake befitting of an autobiography I've been devouring. But regular marmalade just wasn't going to cut it. No. This had to have a touch of gourmet...an unsuspecting twist on a very popular flavor...slightly more posh than it appeared, but quietly so.

I came across this beautiful blog and recipe on Edible Ireland: Seville Orange Marmalade with Whiskey and Ginger and I knew it was just what my marmalade filling needed. Because I had a very specific cake in mind I chose not to add the ginger, but I certainly will on the next round. Also, Seville oranges are not available in small town Canada so I used navel oranges and adjusted the recipe a little. The key to this marmalade: the whiskey!

I have tried to like whiskey on its own but it's tricksy. It smells beautiful and full of caramel...I think we'll be friends, but when I have a taste, it sucker punches me. But in this marmalade it transforms to the flavor I've longed for. It is the best thing to ever happen to whiskey.

wash oranges really well, best to use organic.
let peels soak over night. helps activate the pectin
boil to 220 F
you'll know its ready when you put a few drops on a really cold plate and it firms enough to wrinkle when you push the drops.
I'm not a whiskey connoisseur but I was pretty sure this would serve the marmalade well.
let boiled and ready marmalade sit for 10 mins before adding the whiskey
make sure jars are sterilized
let firm up overnight
testing with orange cake and chocolate buttercream for new blog post.
Orange Whiskey Marmalade
Adapted from Edible Ireland

Makes 3.5 liters of marmalade
Just a note: this process could take 48 hours or longer before you're gobbling it up.

Edible Ireland says: When making preserves, you need to use spotlessly clean, sterile jars, lids and rings. If you have a dishwasher, you can simply run everything through a hot cycle. Otherwise, wash everything in hot, soapy water, rinse well, then place the jars and lids on a baking tray in an oven heated to 140°C (285°F) and keep them there until you’re ready to use them.

1 kg navel oranges (if you have access to Seville oranges - use those instead!)
10 cups water
4 lb granulated sugar
1/2 cup lemon juice
2/3 cup whiskey
  1. Scrub the oranges well and cut each orange in half. It is best to use organic if you can find them.
  2. Squeeze the juice from the oranges and set aside. 
  3. Slice the peel, including the pith, into whatever thickness you like, i.e. thin or thick cut. *NOTE* the pith and peel is where the pectin lives. Don't scrape out the pith thinking it might make it too bitter. If the marmalade is going to set properly you need the pith.
  4. Put the orange peel slices into a large bowl along with the orange juice, then pour over the water. Cover the bowl with cling film and leave the oranges to soak for 24 hours.
  5. Transfer the mixture to a large preserving pan or nonreactive pan (such as an enameled cast iron Dutch oven). Make sure the pot is big enough to accommodate all the mixture so that none splashes out, as all that boiling sugar can burn badly. 
  6. Bring it to a boil, then reduce the heat and simmer, covered, for about 2 hours, until the peel is tender. It’s important that the peel is soft before you add the sugar, because once you do, it won’t ever get any softer.
  7. Add in the sugar and lemon juice (also packed with pectin), stirring until the sugar has dissolved (if the sugar hasn’t dissolved before it comes to the boil, it will crystallize once it cools). 
  8. Raise the heat to a rolling boil and keep boiling, without stirring, until the setting point is reached (either when a sugar/preserving thermometer reads 105°C (220°F) or when a teaspoonful of the marmalade wrinkles up when placed onto a fridge-cold plate and you push it with your finger), which should take 20 to 30 minutes but could take longer. Once it’s done, take it off the heat and allow it to cool for 10 minutes. 
  9. Stir in the whiskey, which may cause the mixture to bubble up a bit again. 
  10. Pour the marmalade into warm, dry, sterilized jars (see above) to within a few millimeters of the rim and seal immediately. Store in a cool, dry place and use within two years.
The first time I tried this it didn't set...it was very runny. But I had scraped much of the pith off the peel and didn't have enough lemon juice. So I put everything back in my dutch oven and added more lemon juice (adjusted in the recipe above) and boiled it longer (about an hour) but tried to keep it at 222°F and re-jarred it in sterilized jars. It firmed up considerably more the next day but next time I will leave the pith in tact and I think I'll have a jammier marmalade.

Thursday, January 10, 2013

Bali Hai Chai - ish

Coconut Cream Vanilla Chai Tea
It's 2013! The Mayan's were wrong and I am glad for it. I'm determined that this year is going to be more organized and disciplined. I'm not setting crazy unreachable goals but I have made a few adjustments in my lifestyle that I know (from previous attempts) will help my faltering immune system and maybe even set me up to handle the ever looming (whispering) "change" (pronounced "shawnj") women my age (and their families) dread.

The hardest decision I made was cutting out refined sugars and flours. Oh, believe me. The irony isn't lost on me. It doesn't mean I won't be using them to make treats for others...after all, it is a joy for me to bake and come up with interesting new ideas or attempt others' creative ideas. It's also a great challenge to come up with nutritionist-approved versions of the treats I love.

Of course, as soon as I give up sugar I crave sweets that are not only on the naughty list, they're virtually impossible to find. Like the Bali Hai Chai.

My first Bali Hai Chai at a Borders Bookstore (may it rest in peace) was possibly my first encounter with euphoria. It was eyes-rolling-into-the-back-of-my-head magical. I've never been able to reproduce that glorious sweet, creamy, coconutty, spicy flavor swirl and I cannot find the ingredients list online...though I didn't search very deep. I have a 3-page Google limit if you know what I mean.

So desperate to fulfill that sweet memory I grabbed:

My chai concentrate is neither sweetened nor caffeinated - good list - (I don't add the tea until I'm ready to make a cup, but in this instance didn't add any) and coconut cream, though high in fat it's the good kind of fat your brain craves. Coconut milk would be fine too. But I only had the cream in my cupboard.

I frothed the coconut cream as I would have milk and added it to my 2/3 full cup of vanilla chai concentrate. Garnished with cinnamon stick and star anise and voila! Coconut Cream Chai that almost tastes like a Bali Hai Chai...if you don't need to give up sugar add a dollop of honey and you'll get even closer! For those going without sugar, the coconut cream (or milk) and the cinnamon satisfies the sweet and creamy craving.
For Paleo/Primal Blueprint followers on a scale of 1 to Paleo this probably falls at about a 7. No sugar, no caffeine, use of coconut milk...though I don't know how the experts feel about coconut cream for their weightloss adherents...and I'm not sure if any of the spices in the chai are no-nos...but I can't imagine why they would be.

Feet up. Cozy blanket. Pinterest-ing healthy food. Sipping my Bali Hai Chai -ish.

Happy 2013!


RESOURCES
If you're in a similar place - making dietary changes for the better - I highly recommend these resources in order:
In Balance Lifestyle Management - Brenda Wollenberg (also has a book out for kids which is great for anybody, not just kids). Brenda has taught me a great deal about nutrition. All the things I thought I knew about nutrition were tossed out the window. She's an amazing resource. Pick this lady's brain about body typing...it will revolutionize your world.

Balanced Bites - Diane Sanfilippo (holistic and Paleo education) Diane seems to have a balanced approach to the slightly controversial Paleo diet. She's more of a "hey, see if it works and make adjustments as you go" than a "my way or the highway" kind of gal. I appreciate that.

The Mood Cure - Julia Ross (fueling your brain to recover from anxiety, blahs, depression etc.) A great resource to learn how to recover from the blahs with high-protein, healthy fat and veggie rich diet and amino acids. I've read this book three times and have had amazing results following her suggestions.


Wednesday, January 9, 2013

An Homage to SprinkleBakes

Double Ginger, Honey, Raw Cocoa Spiced Hot Chocolate Sticks
I have a food crush on Heather Baird of SprinkleBakes. She is a true culinary artist. Her culinary creativity and her imaginative sense of beauty are unmatched (in my opinion) in the sugar-coated world. She inspires me to push the boundaries of flavor profiles and challenges my eye for the pretty.

She posted a beautifully crafted Spiced Hot Chocolate on a Stick to the ModCloth blog before Christmas and I vowed to attempt it so my 5 year-old could have a unique gift to give her teachers. But sickness fell on our house like an anvil...Maddie missed her last week of school and we all spent most of the Christmas break trying to recover from respiratory issues.

On the eve before she returned to school and our bodies mostly in clear, we gave Heather's recipe a whirl. It was easy and tasty. Mads was so excited to try it. But I couldn't help but think that part of the reason we haven't been able to get over our colds is related to the amount of sugar we consumed over the holidays.

So I adapted the recipe in a way that would still excite my 5 year-old but would put less stress on her hard working immune system. Her only disappointment was that she wasn't allowed to eat the chocolate right off the stick...she is my carbon copy, afterall.

I eliminated the confectioners sugar and added a little raw organic honey and substituted raw organic cocoa powder in place of regular cocoa powder. Both are high in antioxidants so though this is a treat for my little one and not to be consumed daily, it will work with her instead of against her.

The taste is reminiscent of this recipe for Ginger Honey Shot Chocolate I posted earlier...only this version is portable and giftable! Just let the recipients know to stir it into 6 oz of hot milk or non-dairy alternative.

Note: my husband broke his camera lens so I am without his fancy camera and have to use my iPad...this is in no way an attempt to be trendy! :)

Double Ginger Honey Raw Cocoa Spiced Hot Chocolate on a Stick

Adapted from SprinkleBakes guest entry on ModCloth blog.

You will need:
8 oz 70% dark chocolate (I use Callebaut)
1/2 cup pure organic raw cocoa powder (I use Organic Nectars)
2 tsp ground ginger
1 tsp cinnamon (plus a little to sprinkle on top)
1/4 tsp cloves
2-4 tbs raw organic honey (optional)
Ziploc or piping bag
1 oz paper or plastic cups (or silicone mini muffin tray or rounded ice cube tray might work)
wooden popsicle sticks, lollipop sticks, bamboo/wooden spoons, or a pretty vintage silver spoon (whatever you'd like to use to make the "stick")
star anise and/or cinnamon sticks to garnish

In a double broiler (simmering water in a pot, place bowl with chocolate on top of pot, not touching the water) melt the chocolate until nearly melted. Remove and stir until all chocolate is melted.
Sift in the dry ingredients and stir. It will be quite thick. Stir in honey, if you choose to sweeten, until everything is well combined. It might look a little grainy but that's ok.

Scrape into piping bag (or Ziploc) and squeeze into cups (about 1 oz). Place "stick" in the middle...should be thick enough to hold it upright. Sprinkle a little cinnamon and place a star anise or cinnamon stick (or both) to garnish.

Refrigerate for 5-10 minutes until hard. Should pop out of plastic cups, but you may have to cut it out of paper cups.

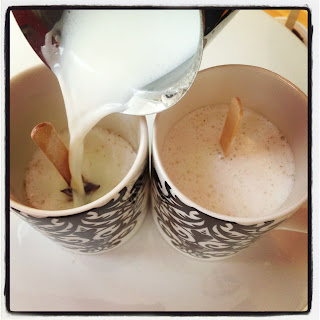
Pour 6 oz hot steamed milk over and let melt for a few minutes, then stir.
Enjoy!