Wednesday, October 12, 2011

Sugar and Spice and Vanilla Chai Nice

Vanilla Chai Latte: homemade vanilla chai concentrate
I love LOVE the fall season. The sun is still warm but the air is cool... the leaves are turning red, orange and yellow. It's the perfect weather to sit on the porch and sip warm, spicy chai.

I love making chai concentrate. My whole house smells like the Spice Market in Istanbul. It's not hard to do and it's considerably more economical than buying the concentrates at the grocery store. And this way you can manage you're quantities of sugar, caffeine, tea strength, etc.

This recipe was adapted from one sent to me by the lovely Dana VanVeller (who got it from her friend Jess, who got it for our friend Marcia Siggelkow, who got it from her friend Jen)...recipe origin unknown at this point, but I will keep you posted when I find it.

What you'll need to do:
Get a stock pot that will hold 5 liters of water, but don't fill it up just yet...
Toss in a blender and blend just to break them up, or use a mortar and pestle:
15 cinnamon sticks

 Then add:
(Again, blend just to break them up)
Or if you're using mortar and pestle crush each spice one at a time and put in pot as you go.

1/4 cup coriander seeds
 1/2 cup whole allspice
 1/4 cup cardamom pods (or just the seeds if that's what you can find)
 1/4 cup peppercorns
 Add 2 vanilla beans sliced lengthwise (or I use 4 left over vanilla bean pods - the guts have been scraped and used in something else)
1 tsp whole cloves (not crushed)
Add 6 inches of sliced ginger.
Add 5 liters of water.
Simmer for 2 or more hours.
Remove from heat
At this point you can add 1 cup of loose black tea (in cheese cloth or tea bags so you can take it out easily). Steep for 2-3 minutes. The longer you steep the tea the more bitter it gets.

I choose not to add tea at this point. I prefer to add a sachet of black tea when I make myself a cup of chai. That way I can choose whether or not I'd like caffeinated or decaffeinated tea.

Pour concentrate through strainer into a pitcher, or I use mason jars so I can store it in my fridge a little easier. Should be good for up to 3 weeks in a sealed jar.

There are many ways to make your cuppa chai. Here is one suggestion:
  • Fill your mug half way with the chai concentrate and warm it up (either stove top in a saucepan or in the microwave...this is when I also add my tea sachet)
  • Put about the same amount of milk in a saucepan and bring to a simmer, whisking the whole time...it should froth a little. Add to your chai.
  • Add honey to sweeten if desired
 Enjoy!

Monday, October 10, 2011

Delectable Chocolate Chip Cookies


Now that autumn is here, a great way to get cozy on a rainy day or  a cool night is making classic chocolate chip cookies.

Everybody swears by their chocolate chip cookie recipe...but I really swear by this one. I have tried dozens of variations of the chocolate chip cookie recipe and this is where I have landed. It is my number one seller at markets and online orders. Why? Maybe it's the melt in your mouth goodness of Belgian chocolate and soft cookie. Or the hint of caramel from the brown sugar. Whatever the reason, they are borderline addictive. The hardest part about making these for other people is not eating them up myself!

Here's what you need to do:
preheat oven to 375 F

combine in bowl (mix with  a spoon not a whisk):
3 cups all purpose flour
1 tsp baking soda
1/2 tsp salt


in a seperate larger bowl, mix: (most helpful in a stand mixer and paddle attachment)
*add in order until each is fully mixed*

2 sticks (1 cup) almost melted butter (3/4 fully melted and mix it until smooth - no butter lumps)
1 cup brown sugar
1/2 cup regular sugar
2 eggs (room temp)
1 tsp vanilla

add dry to wet, mix just until ingredients are incorporated.
The consistency is important. It shouldn't be so runny it drips off the paddle or so stiff nothing falls off the paddle. It should slowly fall off the paddle in chunks
add 1 1/2 cups Belgian chocolate chips...mix until just incorporated...
don't sully this classic with cheap waxy chocolate...it doesn't cost much more to indulge in good Belgian chocolate which you can find at any bulk store or the bulk aisle of your grocery store.
tablespoon dough onto parchment lined cookie sheet.

 Bake for 11-13 minutes...until just brown around the edges...
they'll be a little puffy when you take them out of the oven...
...but they'll flatten a little as they cool
Let cool...at least a little bit...eat up!

Rainy day pick-me-up serving suggestion: serve with steamed milk, latte or cup of tea...cozy on a comfy chair and read the funniest book you have. Enjoy!


Friday, October 7, 2011

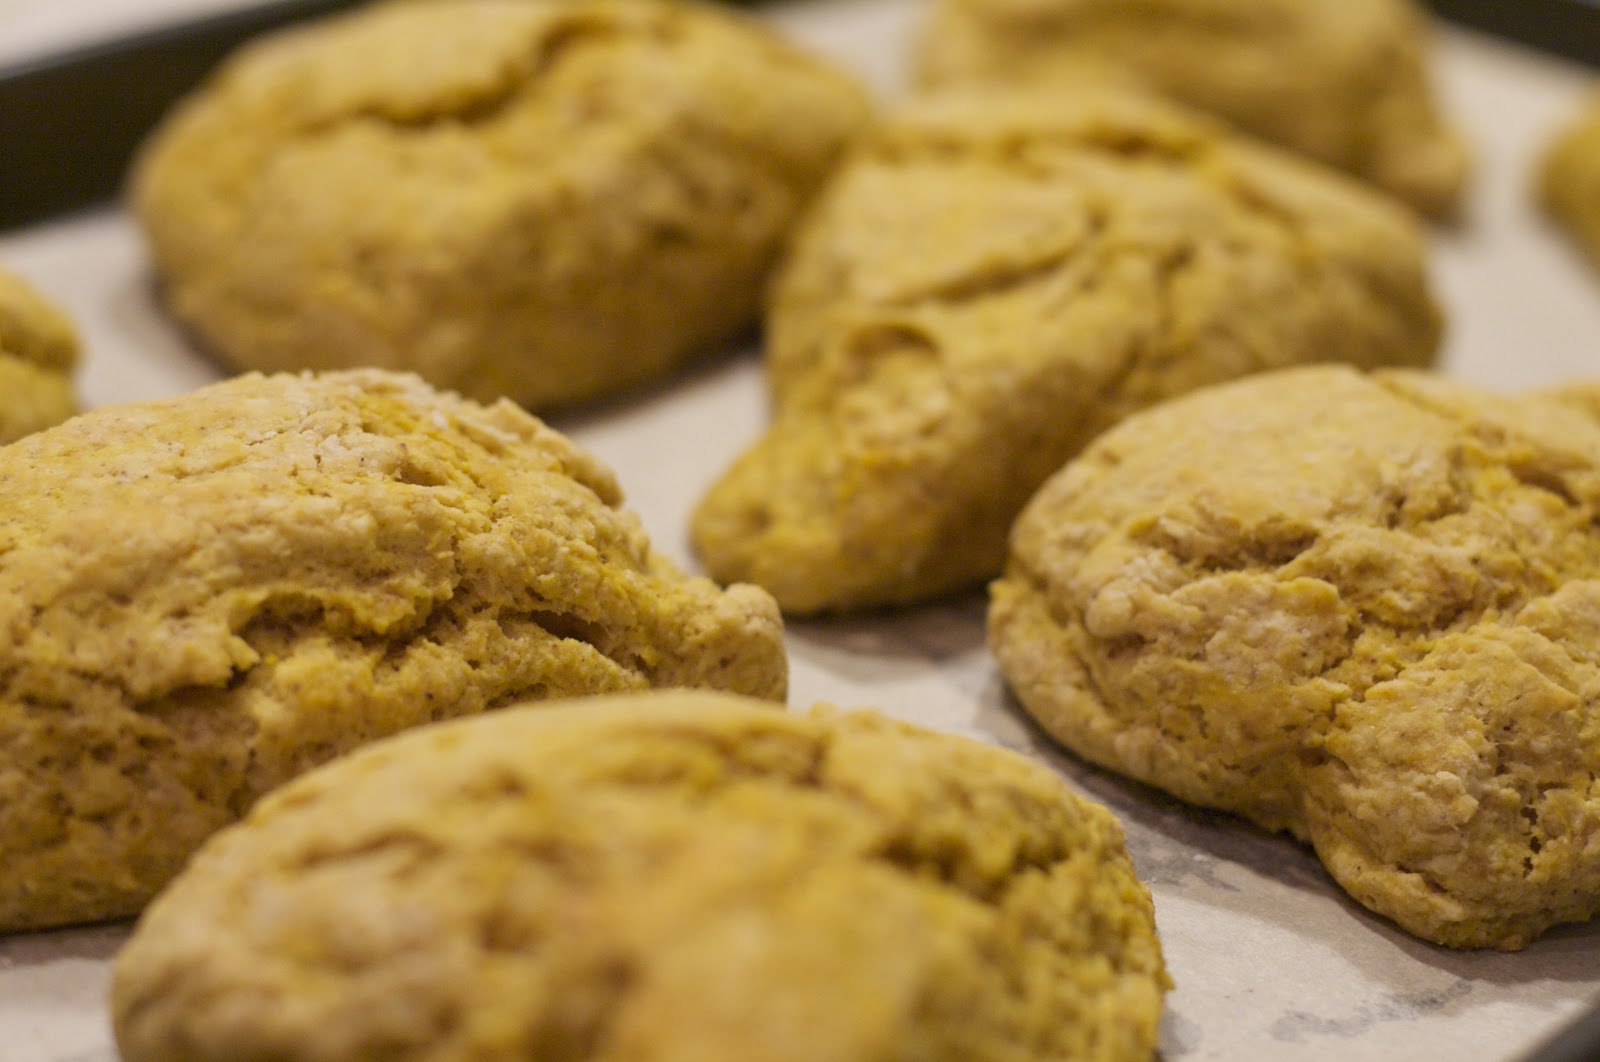
THANKSforGIVINGme PUMPKIN SCONES

Pumpkin Scones

Oh Canada celebrates Thanksgiving this weekend and, as per annual Thanksgiving protocol, I am reminded of the many blessings in my life. I have a loving, patient husband, two adorably loveable little girls (though I find my thankfulness barometer goes up when they're in bed sleeping - they're under 5, you get me), my health, safety, shelter, mobility...I have it pretty good. I am indeed full of thanks.

It is tradition in our family to share a meal during this harvest holiday with friends and/or family. We are not gluttons, but I'm not going to lie - stretchy pants are encouraged. This year we are hosting, but the men (who happen to know their way around a kitchen) will do most of the cooking...I did say I have it pretty good.

And what is Thanksgiving without something pumpkin-ish? Since I'm still a pie crust dummy, I think my contribution will be either pumpkin scones or pumpkin whoopie pies. Maybe both!

If you're going to feast with friends or family this year what will you bring to the table?

Here is my scrumptious pumpkin scone recipe if you're looking for something different to add to the feast...or maybe to have with tea while preparing the night before (or day of, if you're like me!).

Here's what to do:
Preheat your oven to about 360 degrees F. Place parchment paper on a cookie sheet.

whisk together:
1 1/2 cups unbleached all purpose flour
1/2 cup cake/pastry flour
2 1/2 tsp baking powder (fresh, opened within the last month)
4 tbsp sugar
1/2 tsp salt
1/2 tsp ginger
1/2 tsp cinnamon
1/2 tsp nutmeg
1/4 tsp ground cloves


In a measuring cup whisk together:
1/4 cup plain yogurt (I use whole fat yogurt)
1/2 cup pumpkin puree (canned or fresh... not pumpkin pie filling)
1 egg room temp (for room temp: place egg in small bowl and cover with hot water, let stand for 2 minutes)
1/2 tsp vanilla


Take dry ingredients and cut in one stick (1/2 cup) of cold unsalted butter (either by food processor, or pastry cutter or by hand...it's best to touch it as little as possible so the butter remains cold).
 The texture should be sandy and mealy.

Pour wet mix on top and stir in with fork.


Don't over work it, just until all the wet is mixed in...should have some crumbly bits left at the bottom of the bowl. If you find it's still too dry, add a little more yogurt or heavy cream to help.

Dump out mix onto a lightly floured surface. gently work in any crumbly bits. Form dough into an 7-8" disc and cut into 8 pie-like portions.


Place on parchment on cookie sheet.
Bake for 20-ish minutes. Should be golden around edges and a little golden on top.
 While cooling, melt 1/2 cup white couverture chocolate (I use Belgian white from the Bulk Barn) in a double broiler:
  • bring about 2-3 inches of water in a saucepan to a simmer not a boil
  • place a bowl on top - not in - the saucepan 
  • place the chocolate in the bowl and stir while melting until almost melted 
  • remove bowl and continue to stir until all the chocolate has completely melted
Pour chocolate into a piping bag (I just use a Ziploc and cut the very tip of one corner) and zigzag the chocolate over the scones. Or however you want to do it...there's no right way! The white chocolate does add the "scrumptious" factor though.
ENJOY!

Happy Thanksgiving!

Tuesday, October 4, 2011

Cupcake Wars: Cinema Concession Stand

Coca Cola cupcakes with cola caramel filling and buttery buttercream frosting, garnished with sea salt and popcorn.

Last year my friend and I duked it out cupcake style in our own little Cupcake Wars challenge. She lives about 1000 miles (1500km) south of my little hamlet so we had to rely on the discerning palates in our own neighborhoods to let us know how we fared.

The theme: cinema concession stand. We both had to come up with a cupcake that included both the salty and sweet goodness of going to the movies. I played around with some of my favorite movie treats: licorice and peanut m&m's, popcorn and peanut butter cups, sour candies and chocolate covered peanuts. But I couldn't imagine a good, edible cupcake with any of those combinations. Then I thought, "What is the most classic movie treat?" Buttered popcorn and Coca Cola.

I found a Coca Cola cupcake recipe that originally had cocoa in it, but I didn't add the cocoa because I didn't want it to interfere with the cola flavor.

I made a cola caramel by reducing two 237mL bottles of Coke in a medium saucepan down to one third. Then added:
  • 1 cup sugar
  • 2 tablespoons light corn syrup
Stirred to combine and then brought it to a boil over high heat until it reached 350 degrees on a candy thermometer. (it took about 10 minutes)

While it boiled I gathered:
  • 1/2 cup heavy cream (warmed up)
  • 1/4 cup sour cream
When the caramel mixture reached 350 degrees, I removed from heat and allowed it to cool for 1 minute. Then I carefully added the hot cream to the caramel and stirred to combine. I then whisked in the sour cream.

When the caramel cooled I poured it in a squeeze bottle and with an apple corer I popped out "divots" in each cupcake. I filled the hole left behind with the caramel and then replaced divot.

 I upped the butter in the buttercream because I didn't want to use butter flavor extract. I haven't found a butter flavor extract that doesn't taste chemically:
  • 1 1/2 cups unsalted butter, softened
  • 3 1/2 cups sifted icing sugar
  • 1/2 heavy cream
  • 1 tsp vanilla

I beat the butter in a stand mixer until fluffy and slowly added the icing sugar  and cream, alternating between them, but ending with sugar. I added the vanilla at the end and beat until I was happy with the consistency.

I garnished the frosted cakes with coarse sea salt and then added freshly popped, cooled popcorn. I didn't butter the popcorn because that would have made the cake and popcorn too soggy. I was hoping the buttercream would be buttery enough to carry the butter flavor.


 My dear judges were brutally honest. They liked the presentation and could taste the cola, but too much frosting made it too sweet and there wasn't enough saltiness to offset the sweet. If I ever do them again, I will cut down the icing sugar by one cup and up the butter by 1/2 cup and maybe even salt the popcorn as well.
One of my brave judges!

My warring friend did a southern caramel cake and frosting garnished with a chocolate covered peanut and caramel corn on top. She said her cake ended up being a bit crumbly and her frosting too messy, so for this war we declared a draw!


Monday, September 26, 2011

The Best Chocolate Buttercream...EVER!

6" 4 layer chocolate hazelnut cake with chocolate hazelnut buttercream: so hard not to keep a slice for myself!


My fascination with cakes came out of desperation.  One night, while watching a cake show on the Food Network I had such a hankering for cake...and not just any cake, but a tall, layered, pretty cake with smooth buttery buttercream and Belgian chocolate. Something you'd see in Laduree in Paris or BAKED in New York. So, since no one has invented the TV that actually hands you the product it is waving in your face, I popped to the nearest grocery store to buy a cake. Not surprisingly, lardy grocery store cake just didn't cut it for me. I went home empty handed. Somehow my moving to a small town coincided with the plethora of cake and cupcake shows that flooded the Network - a visual feast, yet more and more inaccessible to me.

In typical Kristen fashion, I put on some BBC period drama, poured myself a cuppa Earl Grey (in a pretty tea cup - of course) and started baking...my first attempt turned out to be a crumbly mess. But after further research and a lot more practice I started producing quite deliciously moist, dense cakes - my preference. I'm not a big fan of the light and airy cakes...they tend to fall apart and do not hold up under the weight of more than one layer. And they tend to be on the dry side.

When a recipe calls for milk, I use heavy cream. If it calls for buttermilk, I use whole milk yogurt or sour cream. It makes a difference in texture and moistness. Yes it's a calorie issue to substitute higher fat content...sure it's going to add calories, but let's face it...if you're going to reward yourself with a piece of cake, wouldn't you want it to be rich and moist and flavorful instead of something airy and dry? You might as well have a Ryvita cracker. A waste of a reward if you ask me.

There are quite a few methods to making cakes. I have found the one I prefer to produce the product I like most. If you're about to teach yourself how make cakes try all the methods until you find the density and texture you most prefer. Here are a few resources that I found quite helpful in my quest for the yummiest cake:

Martha Stewart's Wedding Cakes,
my favorite: The Cake Bible,
All Cakes Considered
Baked Explorations,

And the best recipe and resource I have found for cake: Anna Olson's White Chocolate Berry Wedding Cake.  I have adapted this recipe for every possible kind of chocolate cake I could think of. My favorite adaptation is a white chocolate cake with white chocolate buttercream and fresh raspberries and lime zest filling. Heavenly. Another beauty is a chocolate hazelnut cake with chocolate hazelnut buttercream filling and frosting.

The magic of this recipe is entirely in the buttercream. It is by far the best buttercream I have ever come across - both tastewise and level of difficulty. There are no egg whites involved (thank you very much Swiss and Italian meringue buttercreams)...no candy thermometers...and no falling flat and turning into a runny mess (like my last Swiss meringue).

Here is my adaptation for a chocolate hazelnut buttercream based on Anna Olson's recipe above:


2 cups  unsalted butter at room temperature 
16 ounces *couverture* bittersweet chocolate (I prefer Callebaut), melted
2 cups  icing sugar, sifted - very important that it's sifted to get a smooth finish
1/2 cup  chocolate hazelnut spread (I prefer Nutella)
1/2 teaspoon Frangelico liqueur

  1. Add chocolate hazelnut spread to melted chocolate and mix until smooth. Set aside and let cool to room temperature. In a stand-up mixer or in a large bowl with electric beaters, beat butter until fluffy. Beat in cooled melted chocolate combo on medium speed. Reduce speed and beat in icing sugar and Frangelico (icing will be a little soft). You may have to chill to set before using (for about an hour), but only if it's still too thin from the melted chocolate.
  2. Icing can be made ahead and chilled for up to a week, or wrapped and frozen up to a month (thaw refrigerated). Once thawed, beat to make fluffy, then use.
*Please note: your chocolate should be good quality couverture chocolate. Waxy chocolate chips are going to mess with the consistency and flavor of this incredible buttercream...

**UPDATE**
If you need to go nut-free or do not like hazelnut flavor, you can skip the last 2 ingredients. You still end up with a smooth, beautifully chocolaty buttercream.